This is the multi-page printable view of this section. Click here to print.
Documentation
- 1: User Guides
- 1.1: Getting Started
- 1.1.1: UQ members
- 1.1.2: Other AAF members
- 1.1.3: Non-AAF members
- 1.1.4: HIRF users
- 1.2: Logging into XNAT
- 1.2.1: AAF login
- 1.2.2: Alias tokens
- 1.3: Using XNAT
- 1.3.1: Projects
- 1.3.1.1: Granting Access
- 1.3.1.2: Request Storage
- 1.3.2: Subjects
- 1.3.3: Sessions
- 1.3.3.1: Scans
- 1.3.4: Search
- 1.4: Managing Data
- 1.4.1: Downloading Data
- 1.4.1.1: Zip Download
- 1.4.1.2: Desktop client
- 1.4.1.3: Download Scan
- 1.4.2: Viewing Images
- 1.4.3: Uploading Data
- 1.4.3.1: Web Upload
- 1.4.3.2: Resource uploader
- 1.4.3.3: Prearchive
- 1.4.4: Syncing Data
- 1.4.5: Anonymising Data
- 1.4.5.1: Project anonymiser
- 1.4.5.2: Site anonymiser
- 1.5: Processing Data
- 1.5.1: Command line tools
- 1.6:
- 2: Facility Guides
- 2.1: Clinical Trials Processor (CTP)
- 2.1.1: Installation
- 2.1.2: Proxy Server Settings
- 2.1.3: Windows Service
- 2.1.4: Linux Service
1 - User Guides
1.1 - Getting Started
1.1.1 - UQ members
Signing into XNAT
Step 1
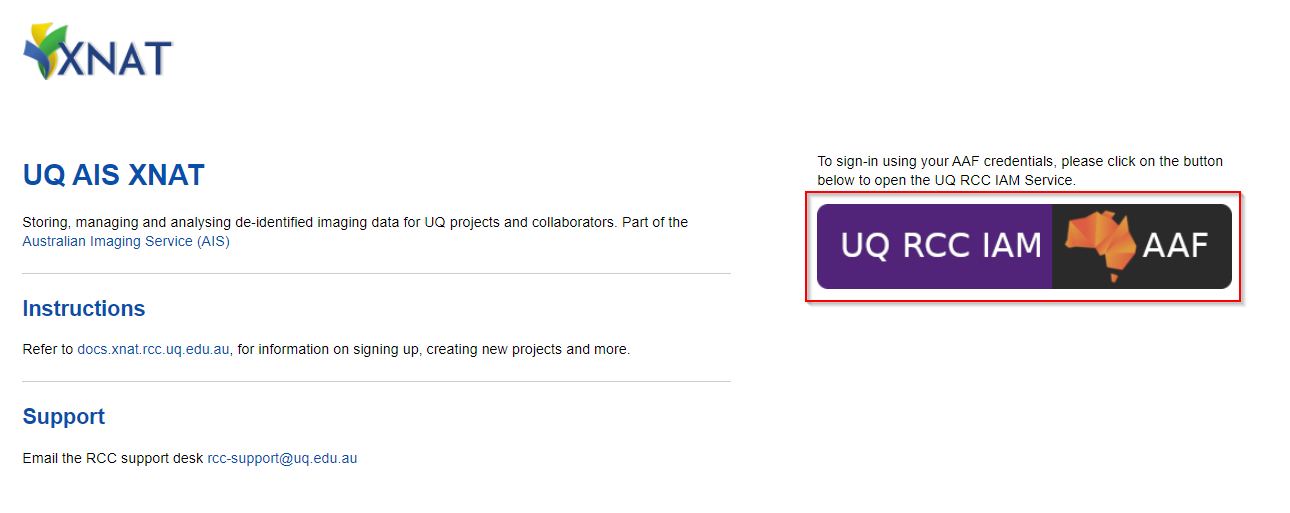
Open https://xnat.rcc.uq.edu.au
Note
This is the link to the UQ AIS XNAT. If you have been provided with a project specific XNAT link to use, use that one insteadStep 2
Login in with the AAF Single sign-on button (shown below).
Follow the AAF login process for your organisation
Step 3
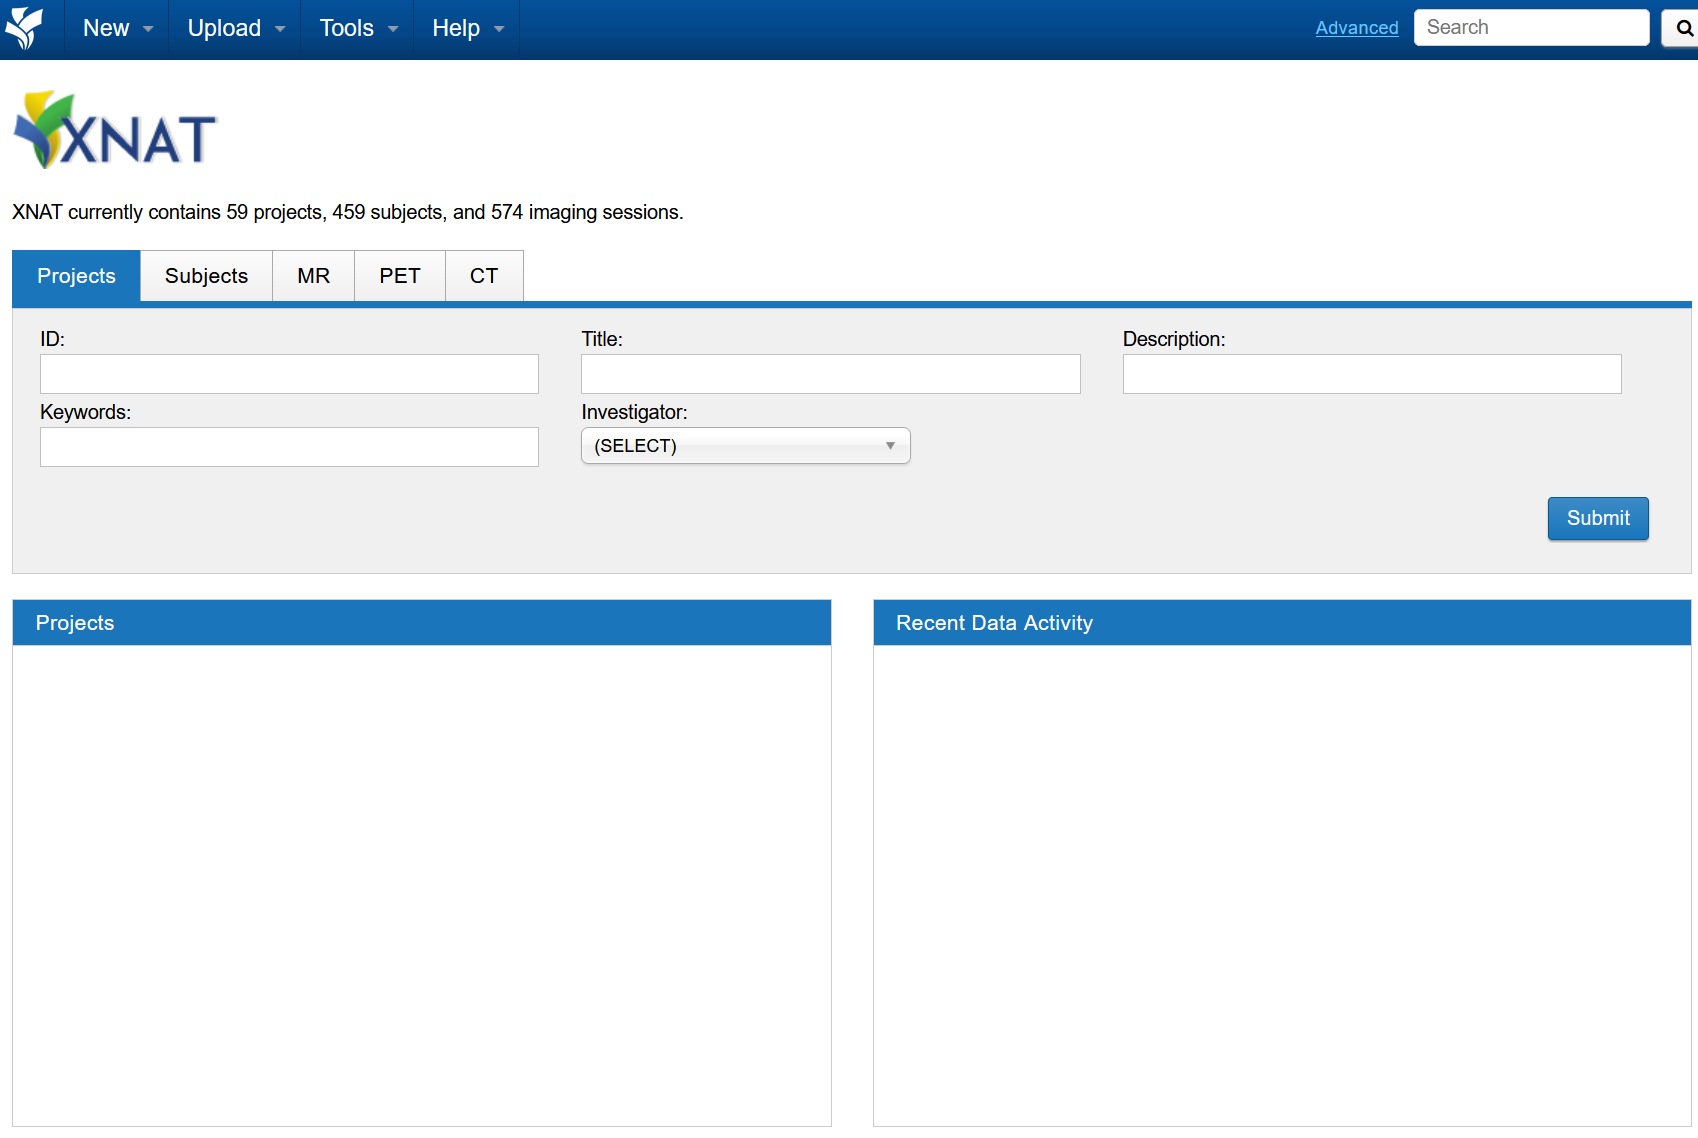
After the AAF sign-in, you should be redirected back to XNAT (Example below)
There will be no projects listed when signing in for the first-time, as your user account would have just been created.

Proceed to to next section for setting up an XNAT project
Creating XNAT project
For UQ users, XNAT uses UQ-RDM HPC collections for storage allocation.
For any general questions about UQ-RDM, please refer to the library guides
Note
Only one member of the project team needs to request for the projectStep 1
Before creating an XNAT project, you’ll require a UQ-RDM HPC Collection
- HPC collections ends with -Q and a 4-digit numerical identifier (e.g. PROJ001-Q0189)
- Non-HPC collections end with -A (e.g. PROJ001-A0189) or -I (PROJ001-I0189)
To create a new UQ-RDM HPC Collection, proceed with the following
Open https://rdm.uq.edu.au/create-record and sign-in
Fill in the record as per your project details

Important
For (6) Data Storage Options, select the second option (The project data needs to be mounted on UQ HPC facilities.)
Any other option will be incompatible with XNAT, requiring a new RDM request
REQUEST DATA STORAGE when complete
Move on to the next step after the RDM collection is provisioned
You should have an RDM collection name ready (e.g. PROJ001-Q0189)
Step 2
Open a ticket with RCC support
Example below (replace __________ with your details)
Subject: Create XNAT project __________
Hello RCC support Can we create an XNAT project for RDM collection __________
Step 3
The support ticket will inform you when the project is set up.
- An XNAT project will be created with the matching name (e.g. PROJ001-Q0189)
- An xnat directory will be created in the RDM collection for storing the XNAT data files
- Please do not write or modify anything under the xnat directory
XNAT Project setup typically takes around ~24 hours from ticket submission
An automated email from XNAT will be sent through when project is ready, and your user has been added
1.1.2 - Other AAF members
This guide is for users from Australian Universities and AAF member organisations, including:
- QUT, Griffith, CQU, JCU, USQ, USC
- CSIRO, Australian Universities
- AAF VHO accounts
Other AAF members usually require UQ AIS XNAT access for:
- Management of data acquisition from sites such as CAI, HIRF, TRI
- Collaborating on projects managed on UQ AIS XNAT
Full list of AAF members found here
For all other organisations, use the Non-AAF members guide
Signing into XNAT
Step 1
Open https://xnat.rcc.uq.edu.au
Note
This is the link to the UQ AIS XNAT. If you have been provided with a project specific XNAT link to use, use that one insteadStep 2
Login in with the AAF Single sign-on button (See below).
Follow the AAF login process for your organisation
Step 3
After the AAF sign-in, you should be redirected back to XNAT (Example below)
There will be no projects listed when signing in for the first-time, as your user account would have just been created.
Accessing XNAT Project
If you are Acquiring data at HIRF, CAI or TRI
- The respective facility will organise the project creation.
- You will receive a follow up email when access has been granted
- Contact rcc-support@uq.edu.au if you have not received access within 5 working days
If you are collaborating on an existing XNAT project
- Contact the project lead to grant you access to the XNAT project
1.1.3 - Non-AAF members
This is for users from non-AAF member organisations, including:
- QLD Health, TRI, QIMR, QLD Xray
Non-AAF members usually require XNAT access for:
- Management of data acquisition from sites such as CAI, HIRF, TRI
- Collaborating on projects managed on UQ-RCC XNAT
XNAT uses AAF for login. QCIF/QRIScloud can provide AAF Virtual Home (VHO) accounts for non-AAF users.
Creating an AAF VHO account
Step 1
Open a ticket with RCC support to request an AAF account
Example below (replace __________ with your details)
Subject: XNAT AAF account for project __________
Hello RCC support
I require an AAF account to access the UQ AIS XNAT service
My details are below
Organisation: __________
Data Acquisition Site: __________
Step 2
AAF’s VHO account will return an email regarding the VHO account registration process
Step 3
After account is provisioned, continue on to the Signing into XNAT guide
Signing into XNAT
Step 1
Open https://xnat.rcc.uq.edu.au
Note
This is the link to the UQ AIS XNAT. If you have been provided with a project specific XNAT link to use, use that one insteadStep 2
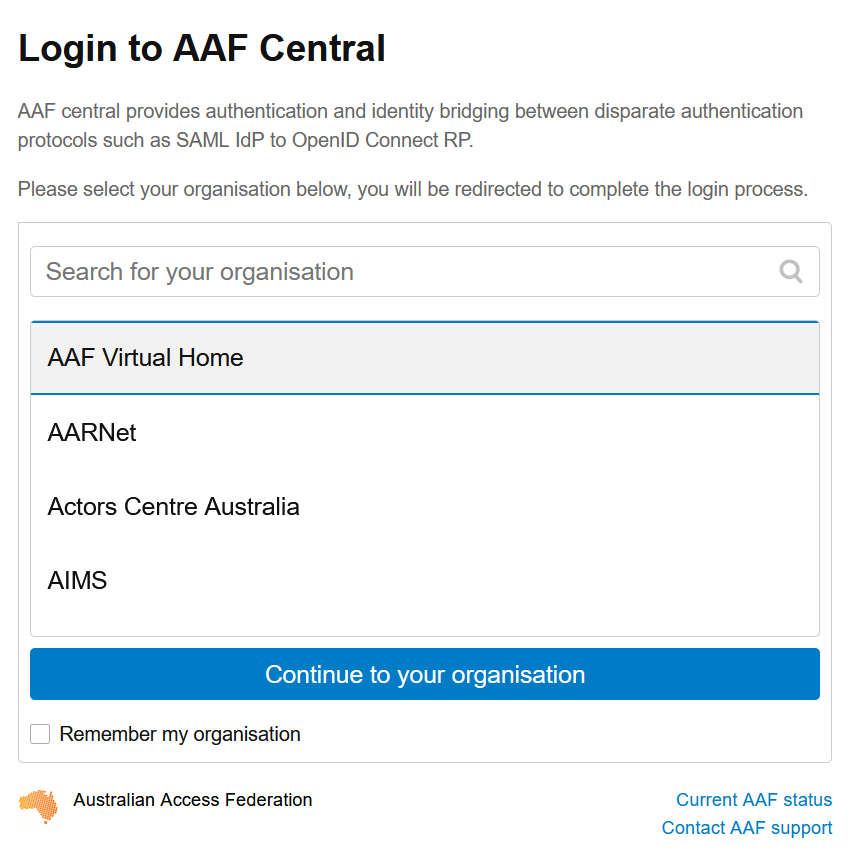
Login in with the AAF Single sign-on button (See below).
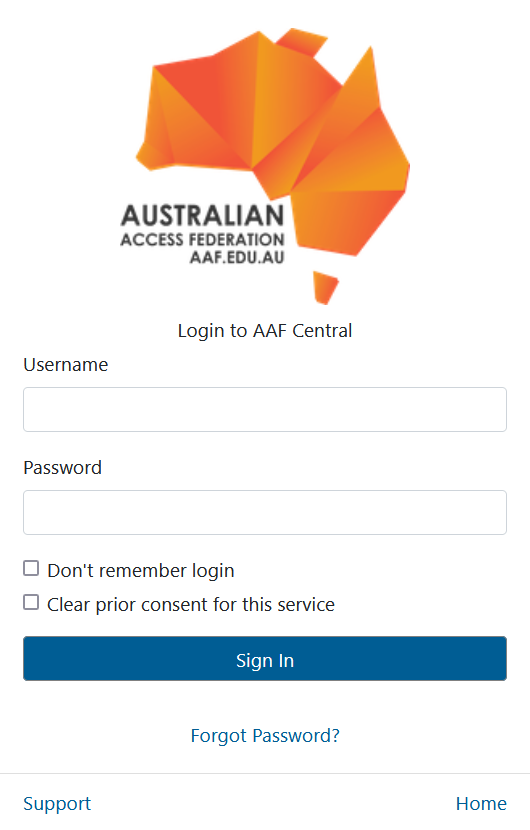
Select the AAF Virtual Home option (See below) and login with your AAF VHO credentials.
Step 3
After the AAF sign-in, you should be redirected back to XNAT (Example below)
There will be no projects listed when signing in for the first-time, as your user account would have just been created.
Accessing XNAT Project
If you are Acquiring data at HIRF, CAI or TRI
- The respective facility will organise the project creation.
- You will receive a follow up email when access has been granted
- Contact rcc-support@uq.edu.au if you have not received access within 5 working days
If you are collaborating on an existing XNAT project
- Contact the project lead to grant you access to the XNAT project
1.1.4 - HIRF users
Data acquired at HIRF can be sent to the UQ-RCC XNAT repository
To get started, refer to the relevant guide below:
- UQ members
- UQ Staff and Students
- Other AAF members
- QUT, Griffith, CQU, JCU, USQ, USC, Bond
- CSIRO, QCIF, Australian Universities
- Full list of AAF members found here
- Non-AAF members
- TRI, QIMR
- QLD Health, QLD Xray, Pacific Radiology
If you have any questions, contact rcc-support@uq.edu.au or HIRFAdministration@health.qld.gov.au
1.2 - Logging into XNAT
AAF
AAF is the recommended way to sign up and login to XNAT.
If your organisation is not in the AAF list during the sign-up process, please contact the respective XNAT support for further options
If your organisation is part of the Australian Access Federation (AAF), you can use your AAF credentials to sign up. See here
For more details on the Australian Access Federation, see https://aaf.edu.au
RCC Authenticate
To use this login, you would have received an email from a UQ XNAT administrator with the login information.
Note
If you have not received an email, either use AAF or contact the respective XNAT support.
RCC Authenticate credentials are NOT your UQ or institutional username and password
1.2.1 - AAF login
AAF is the recommended way to sign up and login to XNAT.
If your organisation is not in the AAF list during the sign-up process, please contact the respective XNAT support for further options
If your organisation is part of the Australian Access Federation (AAF), you can use your AAF credentials to sign up. Follow the steps below to sign-up/login using AAF.
- Open https://xnat.rcc.uq.edu.au
- Login in with the AAF Single sign-on button (shown below)

This will take you to your XNAT home page.
First time users
First time users will only see publically accessible project when they login1.2.2 - Alias tokens
AAF is used for logging into the XNAT website itself.
But there are a lot of tools and services that will require a connect to the XNAT server externally
These could include
- Windows or Mac desktop clients, like XNAT Desktop
- Command line tools such as xnatpy, pyxnat, xnatutils etc
- XSYNC
All of these tools and services need a way to authenticating to your XNAT account without AAF.
An alias token is a time-limited, long, randomised username and password used for authenticating from external services, without compromising your AAF account or credentials. They can be generated and revoked easily

We’ll look at how to generate them next
Generating Alias tokens
To access the alias token Click your name on the top right of the website. This will take you to your user profile management page
Then click the “Manage Alias Tokens” option
There, you’ll find the option to “Create an Alias Token”

When you create the alias token, it will appear as a new entry
Alias tokens expire 60 days after creation There will be an expiration date column.
You can have multiple alias tokens. And they can be deleted and created as needed to revoke permissions. Each one will be randomised and unique.
Lets have a look at the alias token details which you can access by clicking on the token.

The key attributes that we need are the alias and the secret The alias is your username And secret is your password
So you can use the alias and secret for any external clients requesting a username and password.
Just note, the alias and secret are effectively a temporary set of login credentials. Do not reveal the secret. It is effectively your temporary password. If you no longer require the alias token, or suspect a secret has been compromised, just delete the alias token.

1.3 - Using XNAT
For further information refer to the XNAT official guides on browsing data
1.3.1 - Projects
When you login into the home page, the list of projects that you have access to will be on the left
- All datasets have to go into Projects
- User access is controlled at the project level

1.3.1.1 - Granting Access
Switch to the Access tab. Use Add User or Add Users from List to select the user to add

Select role from
- Owners
- Members
- Collaborators
User roles
The following table outlines the permissions given to each role.
| Permission | Owners | Members | Collaborators |
|---|---|---|---|
| Data - Create | ✓ | ✓ | ✗ |
| Data - Read/Download | ✓ | ✓ | ✓ |
| Data - Update | ✓ | ✓ | ✗ |
| Data - Delete | ✓ | ✗ | ✗ |
| User - Add/Remove | ✓ | ✗ | ✗ |
| User - Change role | ✓ | ✗ | ✗ |
1.3.1.2 - Request Storage
Note
Default limits on collections are 1TB storage and 1 million files.If either limit is reached, you may not be able to add or update files.
Use the following steps to request to request an increase in storage size and/or file count limit:
Step 1
Go to rdm.uq.edu.au, login and select your RDM collection
Step 2
Click the Request more storage button (shown below)

Step 3
Fill the form with the relevant details and submit.
E.g. For a project with 2 years of data acquisition, collecting a total of 1TB and 1 million files, the request form could look like this:
...
Increase storage space by 1TB.
Increase file count limit by 1M files.
Collection is connected to UQ XNAT so cannot zip/tar files
0.5TB per year
0.5M files per year
...
1.3.2 - Subjects
The Project page will have a list of Subjects If we click one of the subjects… it will take us to the subject page

The Subject will have some associated metadata and name extracted from the DICOM headers of the datasets
Editing Subjects
We can edit subject details and metadata from the actions panel on the right

For instance, if you want to rename the subject You click the button next to the Subject ID

This will pop-up the following dialog box for you enter the new subject. Click modify, and then submit for the changes to take effect.
Just note, subject renaming can take a few minutes to take effect

1.3.3 - Sessions
Sessions are divided into three types, based on modality information extracted from the DICOM metadata
- MR
- CT
- PET
The following is an example MR session

Editing Sessions
We can edit session details and metadata from the actions panel on the right

Here we can change some of the key properties of the sessions, such as
- Change session name
- Move sessions to other projects
- Move sessions to other subjects
- Create a new subject, and move session to that subject
- Fix invalid or blank session names

1.3.3.1 - Scans
The Scans themselves are listed at the bottom with the relevant series descriptions and other information If you hover over one of them, and click the highlighted view details button. This will open up a more details and an image preview window

Here we can also view View DICOM headers

And see the DICOM headers as shown on the right

1.3.4 - Search
You can search across Projects, Subjects or Sessions And Sessions are broken up into MR, PET and CT

For instance, we can fill a couple of fields on the MR Sessions search You don’t have to specify all the fields

And XNAT will provide a list of results.

1.4 - Managing Data
1.4.1 - Downloading Data
- Navigate to Scan or Session (See guide on browsing data)
- Select
Downloadfrom controls on top right. - Use the following settings for downloading dataset as zip

For further information refer to the XNAT official guide on downloading data
1.4.1.1 - Zip Download
The Project, Subject and Sessions page has the option to Download Images from the right hand side menu


Select Option 2: ZIP download
Note
Untick Simply downloaded archive structure to keep scan names in scan folders
Filter out the Session and scans from the first two columns and select Submit
1.4.1.2 - Desktop client
The XNAT Desktop client is maintained by the XNAT development team. For information see the link below.
- XNAT Desktop client
- https://www.xnat.org/download/desktop-client/
Install client
Download and install the client for you operating system

Download images
The Project, Subject and Sessions page has the option to Download Images from the right hand side menu

Select Option 1: Download via Desktop Client
Note
Untick Simply downloaded archive structure to keep scan names in scan folders
Click Download Via App

Select a local destination folder

Download should start, and progress can be monitored
1.4.1.3 - Download Scan
Induvidual scans can be downloaded from the Sessions page

Multiple scans can be selected and downloaded using Bulk Actions

1.4.2 - Viewing Images
XNAT OHIF Viewer
AIS XNAT instances come with the XNAT OHIF Image viewer Which is a plugin developed by the Institute for Cancer Research in London
Just note, if your publication uses the OHIF viewer, they have an article for citation. This information is all available at the link below
- Documentation
- https://wiki.xnat.org/documentation/xnat-ohif-viewer
- Using the XNAT OHIF Viewer
- https://wiki.xnat.org/documentation/xnat-ohif-viewer/using-the-xnat-ohif-viewer-122978515.html

Opening images in OHIF viewer
You can access the viewer from Session page
Just click View Image on the actions panel
Note
Ignore the View in Legacy Viewer
This will take you to the OHIF Viewer

1.4.3 - Uploading Data
- Web Upload (Compressed image uploader)
- XNAT data client
- CTP
For further information refer to the image session upload methods in XNAT
1.4.3.1 - Web Upload
Uploading DICOM datasets
This is for uploading de-identified DICOM files using the uploader directly from the XNAT website
- De-identify DICOM on scanner or upload pc
- Zip DICOM files into a zip file
- Login to XNAT (see Login to XNAT)
- From the top panel, select Upload → Images → Compressed Uploader

- Specify the following options:
- Project
- Destination: Select Prearchive
- Choose file to select zipped file with DICOMs

- Click Begin Upload
Wait for:
- Upload percent bar to finish (**percent bar may not appear for small datasets)
- Background processes panel to appear on bottom right
- Green tick on under Upload extraction/review for archival


For further information refer to the XNAT official guide on using the compressed image uploader
1.4.3.2 - Resource uploader
This is to create a web upload form for repeated uploads of any data type.
Navigate to Project → Manage → Project Resource Settings → Start

Select Image Sessions. Enter the following required fields
- Title: e.g. Rawdata
- Resource Folder: e.g. RAW
- Extract compressed files by default
Select Add when complete

To upload file(s) using the resource uploader, Upload Additional Files from the Sessions page

1.4.3.3 - Prearchive
If a dataset has not arrived into your XNAT project, the prearchive would be the place to check
This usually happens when:
- a DICOM dataset matching an existing session gets resent
- a part of a session gets uploaded separately
Accessing the prearchive
Go to Upload on the top menu, and Go to prearchive

The following is an example of a session that is in conflict. We can select the session and choose Details.

Here we can download the session, or individual scans. And review the datasets
- Choose Archive if you want the dataset merged into the existing one on the archive,
- choose Modify and Archive if any details need to be changed before archiving, or if you don’t want this dataset to merge with the existing one

1.4.4 - Syncing Data
The UQ-RCC XNAT may be able to sync datasets to other XNATs in Australia.
To see if your project is able to be synced, send a ticket to RCC support (rcc-support@uq.edu.au)
They will need the details of the XNAT that you wish to share data with.
1.4.5 - Anonymising Data
1.4.5.1 - Project anonymiser
The Project level anonymiser uses a scripting syntax called DicomEdit to modify, reassign or blank DICOM tags. You can actually use this to create automated workflow for renaming DICOM metadata on datasets
version "6.1"
project != "Unassigned" ? (0008,1030) := project
(0010,0010) := subject
(0010,0020) := session
The example in this screenshot basically replicates the behaviour in the HIRF onsite anonymiser for remapping the ReferringPhysicianName, PatientName and PatientID

You can use DICOMedit to enforce a particular naming and tagging scheme across your entire project this way.
Anonymising existing sesssions
Note
If you’re planning to use the project level anonymiser, best solution would be to have your project’s renaming, retagging or anonymisation scheme established before starting data acquisition.The Project level anonymiser works best for new sessions, as it runs when the dataset is being ingested into the XNAT archive, or when sessions are renamed. By default, it does not anonymise sessions that are sitting in the archive already.
If you need to trigger your anonymisation on an existing session
- Edit a session name. Modify
- Then edit it back to its original name
This will trigger the anonymisation script.
Warning
Session edits take a bit of time, as the files and metadata are modified during edits, so allow some wait time if you use this method.
1.4.5.2 - Site anonymiser
HIRF and CAI data are anonymised on-site by default with the following protocols
Modified Tags
| DICOM Tag | Original value | New value |
|---|---|---|
| PatientBirthDate | 10/12/2000 | 1/1/2000 |
| PatientComments | XXXXXXXX | Project:Proj001 Subject:TEST_MR Session:TEST_MR-20210405T1220 |
| ReferringPhysicianName | Proj001 | Proj001 |
| PatientName | XXXXXXXX | TEST_MR |
| PatientID | TEST_MR | TEST_MR-20210405T1220 |
Blanked Tags
| DICOM Tag |
|---|
| AccessionNumber |
| ImageComments |
| OperatorName |
| OtherPatientIDs |
| AdditionalPatientHistory |
| AdmittingDiagnosisDescription |
| MedicalRecordLocator |
| NameOfPhysicianReadingStudy |
| Occupation |
| OtherPatientNames |
| PatientBirthTime |
| PerformingPhysicianName |
| PhysicianOfRecord |
| ReferringPhysicianAddress |
| ReferringPhysicianPhoneNumbers |
1.5 - Processing Data
1.5.1 - Command line tools
XnatUtils
https://github.com/Australian-Imaging-Service/xnatutils
Install xnatutils using
pip3 install xnatutils
Authenticating using .netrc
- Create an alias token. Or use an existing alias token
- Create a
.netrcfile in your home directory with the following details
machine https://xnat.rcc.uq.edu.au
user <your-alias-token>
password <your-alias-secret>
xnatpy
https://xnat.readthedocs.io/en/latest/
Pyxnat
1.6 -
Example
Example
2 - Facility Guides
2.1 - Clinical Trials Processor (CTP)
2.1.1 - Installation
Installing CTP on Windows 10
CTP installation steps
- Create a new user for CTP on UQ RCC XNAT (not an AAF/OpenID user) with required project access, without admin access
- Download the following files
- CTP-installer.jar
- ctp_clinical_site_to_xnat_config.xml
- dcmtk-3.6.6-win64-dynamic.zip
- dicom_viewer_Mrbrain.zip
- Optional if you need more DICOM samples: sample1.zip
- Install CTP using:
cd INSTALL_FOLDER (replace with your actual folder) java -jar CTP-installer.jar - Replace CTP/config.xml with ctp_clinical_site_to_xnat_config.xml
- Edit CTP/config.xml
- Change “xxxx.xxxx” in two “url” tags to “xnat.rcc.uq.edu.au”
- Change “xxxx” username and password tags to match new user from step 1
- If CTP internet access is via a proxy server, add the proxy server element to the Server configOnce this element is added proxy server settings can be updated in the CTP Launcher GUI
...
<Server ...>
  <ProxyServer
    proxyIPAddress=""
    proxyPort=""
    proxyUsername=""
    proxyPassword=""/>
</Server>
...
- Add CTP the anonymiser script
- Copy CTP/scripts/DicomServiceAnonymizer.script to CTP/scripts/dicom-anonymizer-sender.script
- Add the PROJECTID parameter to the list of parameters at the start of the file
<p t="PROJECTID">my xnat project id</p>
- Change the PatientComments element 0010,4000 to set XNAT project routing info
@always()@append(){Project:@param(@PROJECTID) Subject:@contents([0010,0010]) Session:@contents([0008,0050])}
- Review/set other parameters at the start of the file
- PROFILENAME, eg. AIS-Clinical-Site-210604
- DATEINC, eg. 0
- PROJECTNAME, SITEID, SITENAME, TRIALNAME, TRIALSPONSOR as required
- Optional: review script to check anonymisation settings are appropriate
- Start CTP GUI
java -jar Launcher.jar - Click the CTP “Start” button
- Click the “CTP Home Page” button to open the Web UI
- If the browser can’t connect, check CTP is not already running, or try changing the Server port
- Login
- Top RHS banner should show “Welcome admin”
- Optional: click “User Manager” to change default usernames/passwords
- Optional: click “DICOM Anonymizer” to view/edit anonymiser script
- Unzip DCMTK and MrBrain dicom sample
- Try sending an dicom to CTP using dcmtk
cd dcmtk-3.6.5-win64-dynamic/bin dcmsend localhost 25055 ../../dicom_viewer_Mrbrain/MRBRAIN.DCM - Login to the XNAT server with an admin account to view Prearchive
- Use “Upload” → “Go to prearchive”
- DICOM should appear in “Receiving” status, with project id assigned from step 6
- Optional: non-admin users need to search by subject/etc
- Use Refresh to check when “Ready” or it disappears from list (as it has been routed to the project)
- Debugging: use dcm2xml from DCMTK to check anonymised dicom file under CTP/roots/FileAfterAnonymization25055
- Logout and login with the new XNAT user from step 1
- Navigate to the project set in step 6
- You should see the dicom listed as subject “1737775597”
- Use subject “1737775597” → “MR Session” → “View Images” to view the uploaded image
- Try a dicom send from the scanner using PC address and port 25055 (check windows firewall settings?)
- Enable CTP as a Windows Service. Instructions here
Further information
If you need a different commit of CTP-installer
git clone https://github.com/johnperry/CTP
cd CTP/products
git checkout <commit> CTP-Installer.jar
If you need other AIS CTP config files
git clone https://github.com/Australian-Imaging-Service/configuration.git
cd configuration/CTP
CTP documentation links:
2.1.2 - Proxy Server Settings
If CTP uses a proxy server for internet access, you can update the CTP proxy server settings on Windows as follows
Stop the CTP Windows service
- If you already have a Services short-cut on the Windows desktop, double-click the short-cut to start Windows Services
- If not, click the Windows start button, start typing “services” and the Services App icon should appear
- Click the Services App icon to start Windows Services
- Locate the CTP service in the list of services, right-click and select Stop from the context menu
Start the CTP Launcher
- If you already have a CTP Launcher short-cut on the Windows desktop, double-click the short-cut to start the CTP Launcher
- If not, locate the CTP service in the list of services again, right-click and select Properties from the context menu
- Use the Path to executable entry to find the installation folder for CTP. It will be in the form
<install folder>\windows\CTP.exe - Open a Windows Command prompt window
- Click the Windows Start button, start typing “cmd” and the Command Prompt App icon should appear
- Click the Command Prompt App icon to start the Command Prompt
- In the Command Prompt window, enter the following commands
cd <install folder> java -jar Launcher.jar - Use the Path to executable entry to find the installation folder for CTP. It will be in the form
Navigate to the CTP Launcher Configuration tab
Use the navigation panel on the left to select Configuration -> Server -> ProxyServer
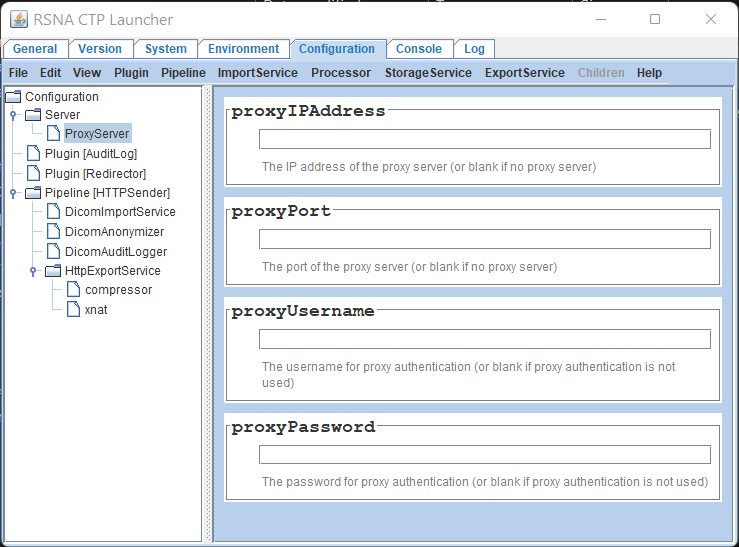
Update the proxy server settings in the right panel as required. You can set an IP address or host name in the proxyIPAddress field
Select File -> Save from the main menu bar to save your changes
Close the CTP Launcher using the Window close button at the top right
If the following prompt appears, select No.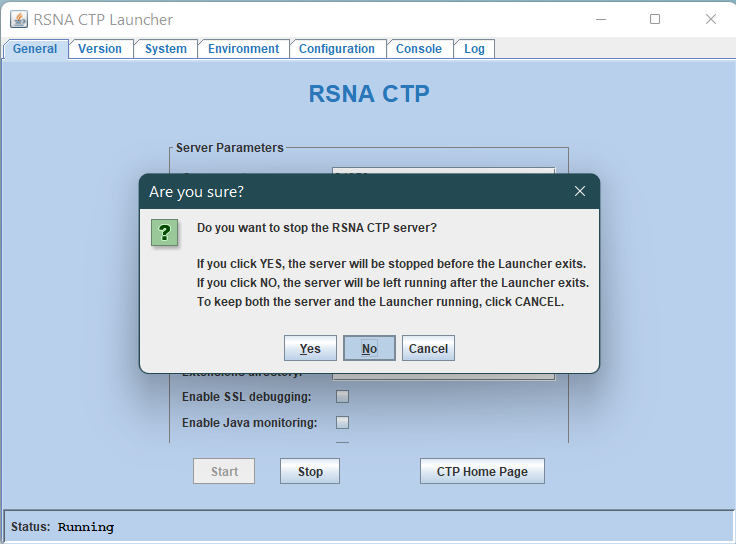 If the CTP is stopped, restart it from the Windows services menu (See below)
Close the Command Prompt window
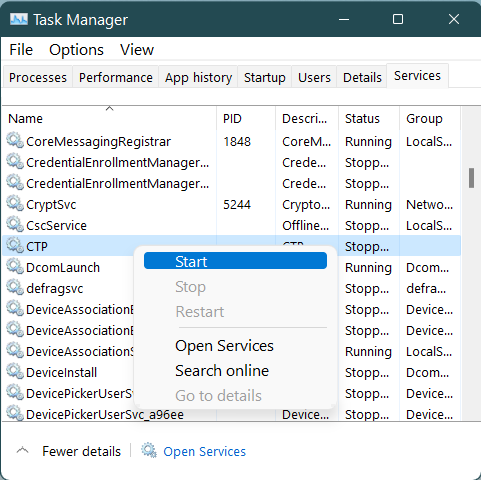
Re-Start the CTP Windows service using Windows Services
Locate the CTP service in the list of services, right-click and select Start from the context menu
Troubleshooting
- If the CTP Windows service Stop is disabled, try restarting Windows Services as administrator by right-clicking the icon and selecting Run as administrator
Further information
2.1.3 - Windows Service
The CTP install.bat script uses Apache procrun. Use the following steps to enable CTP as a Windows service, including an update to use a JRE other than system default (leave out step 2 if using the system default JRE)
- Install CTP
java -jar CTP-installer.jar - To use JRE other than system default, edit
<ctp-home>/windows/install.bat. Find the –Jvm=auto, add –JavaHome entry and set both as follows--JavaHome="<jre home> " ^ --Jvm="<jre-home>\bin\server\jvm.dll" ^- ^ is needed to wrap/continue command line in batch file
- The jvm.dll location under
is the same for JRE 1.7 and 1.8 installs. Confirm this is the case for other JREs/JDKs
- Run install.bat as Administrator to create the CTP windows service
cd <ctp-home>/windows install - Open Windows Services as Administrator and start the CTP service
- Open CTP administration page in Web browser
- Confirm the correct JRE is reported in Admin → System Properties and/or Admin → Log Viewer → ctp.log
Troubleshooting
- Installation paths are set in install.bat during CTP install so it won’t work if you move the CTP folder somewhere else after install
- If removing the service (with uninstall.bat) leaves the service stuck in delete pending state, reboot the system to complete
Further information
2.1.4 - Linux Service
Ubuntu
Open ./linux/ctpService-ubuntu.sh. Update the following parameters:
USER=ubuntu
CTP_HOME=/opt/ctp/CTP
JAVA_BIN=/usr/lib/jvm/java-17-openjdk-amd64/bin
JAVA=$JAVA_BIN/java
CTP_PID=$CTP_HOME/ctp.pid
Run the following to install the ctpService into init.d
sudo ln -s ./linux/ctpService-ubuntu.sh /etc/init.d/ctpService
sudo update-rc.d ctpService defaults 98 02
Start and stop CTP using the following commands
sudo service ctpService start
sudo service ctpService stop